
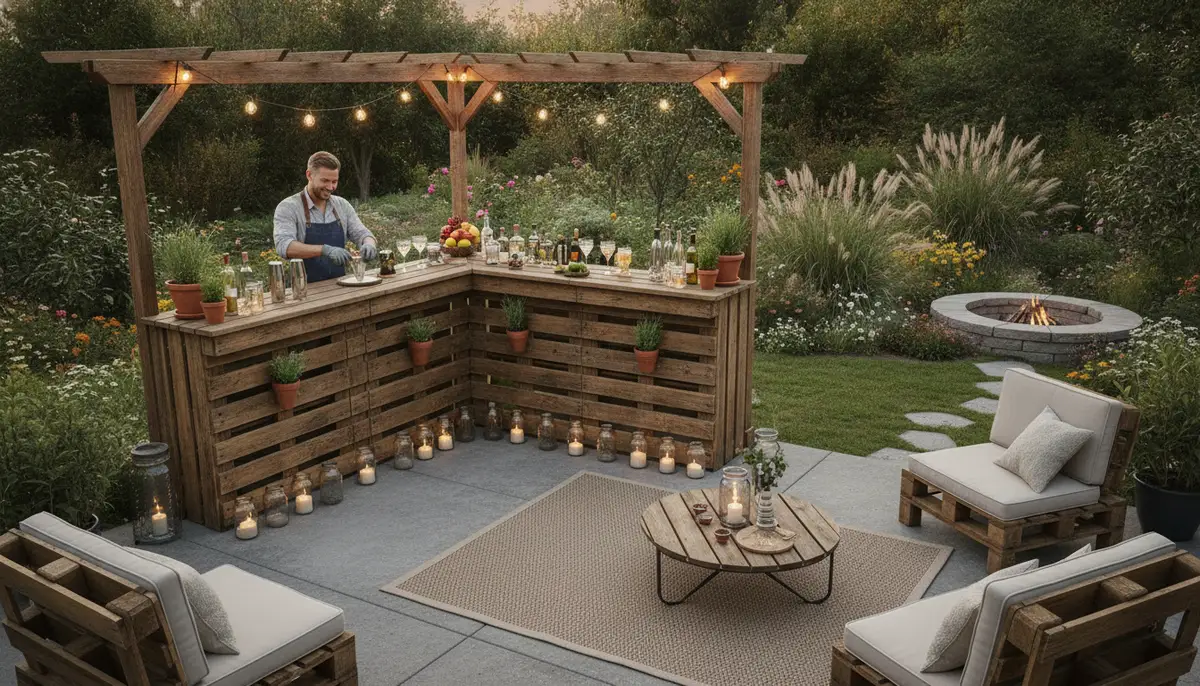
Transform Your Backyard with a Custom DIY Pallet Bar: A Guide to Upcycled Outdoor Entertaining
The modern backyard has evolved from a simple patch of grass into a sophisticated extension of the home. For homeowners looking to increase their property’s "liveability" and entertainment potential, few projects offer as much character and utility as a custom outdoor bar. While high-end outdoor kitchens can cost tens of thousands of dollars, the story of Ed and Jan Wright—featured in our DIY Diaries series—proves that with a little ingenuity and some upcycled materials, you can create a centerpiece for your yard that is both functional and deeply personal.
In this guide, we will explore the practical steps and strategic considerations for building a pallet bar, inspired by the Wrights' successful project. Whether you are preparing your home for the market or simply looking to enhance your summer hosting, this project offers a high return on effort.
The Strategic Value of Outdoor Living Spaces
From a real estate perspective, outdoor amenities are more than just luxuries; they are strategic investments. A well-executed backyard entertainment area can significantly boost a home's appeal during a sale. When prospective buyers walk through a property, they aren't just looking at square footage; they are imagining their future lifestyle. A custom bar suggests a home built for community and relaxation.
If you are currently looking to sell, ensuring your outdoor spaces are staged effectively is just as important as the interior. For more insights on preparing your home for the market, see our guide on Mastering the Open House: A Strategic Guide for Buyers, Sellers, and Real Estate Professionals.
The beauty of a pallet bar lies in its "upcycled" aesthetic, which fits perfectly with current trends in rustic and industrial home design. By using reclaimed materials, you create a conversation piece that feels organic to the landscape.
Sourcing and Preparing Your Materials
The catalyst for Ed and Jan’s project was a common one: leftover materials from a landscaping overhaul. After a sewer line repair required new paver stones, the couple found themselves with several high-quality pallets. Instead of discarding them, they saw the foundation of a 10-foot bar.
Selecting the Right Pallets
Not all pallets are created equal. When sourcing pallets for a DIY project:
- Check the Stamps: Look for the "HT" (Heat Treated) stamp. This indicates the wood was treated with heat rather than chemicals. Avoid pallets marked "MB," which indicates treatment with Methyl Bromide, a toxic pesticide.
- Assess the Condition: Look for pallets with minimal cracking and no signs of oil or chemical spills.
- Size Matters: Standard pallets are usually 48" x 40". For a standard bar height (usually 42 inches), pallets are almost the perfect height once you add a base or legs.
The Bar Top: Pine vs. Hardwood
For the bar top, Ed and Jan opted for pine sourced from a local independent lumber yard. Pine is an excellent choice for DIYers because it is easy to work with and takes stain beautifully. However, because it is a softer wood, it requires significant protection to survive the elements.
READY SEAL Exterior Wood Stain a...
Engineering for Durability: Staining and Sealing
An outdoor bar faces a constant barrage of UV rays, rain, and temperature fluctuations. Without proper treatment, the wood will grey, warp, and eventually rot.
The Wrights’ process involved a two-step approach to longevity:
- Staining: They chose a dark stain to provide a rich, sophisticated look that contrasts with the rustic nature of the pallets.
- Sealing: Several coats of polyurethane were applied. For outdoor projects, a "spar urethane" is often recommended as it contains UV blockers and is formulated to expand and contract with the wood as temperatures change.
When building your own, ensure you sand all surfaces—especially the pallet slats—to a smooth finish before applying any chemicals. This prevents splinters and ensures the sealer adheres properly to the wood fibers.
The Assembly: Creating a "Leanable" Structure
The Wrights’ bar stretched ten feet, a length that requires careful structural planning to prevent sagging. If you are building a bar of this scale, the frame must be reinforced.
Hidden Fasteners
To achieve a professional look, Ed took extra care to ensure that screws were only visible from one side. In DIY construction, using pocket-hole joinery or driving screws from the underside of the bar top into the frame can hide unsightly hardware. This small detail elevates the project from a "pallet craft" to a piece of custom furniture.
Integrating the Components
The bar was assembled by joining the pallets together to form the front and sides, then mounting the stained pine top. If you are also working on a garden-focused backyard, consider how the placement of your bar complements your greenery. A bar situated near a kitchen garden can serve as a convenient prep station. For tips on garden placement, read about how to Maximize Your Harvest: The Essential Guide to Designing a Productive Raised Bed Garden Layout.
Overcoming the "Uneven Ground" Challenge
One of the most common setbacks in outdoor construction is a yard that isn't level. Ed and Jan’s bar sat in a section of the yard that was sloped, causing the 10-foot top to flex and feel unstable.
Instead of trying to re-grade the entire yard—a massive undertaking—Ed used an ingenious "industrial" solution: Black Iron Pipes.
By using black iron pipes as legs and reinforcements, he was able to customize the height on each side. The pipes on the downhill side were cut longer than those on the uphill side. This created a perfectly level surface for the bar top while maintaining a stable connection to the ground. Ed proudly noted that the top is now "leanable," meaning guests can rest their weight on it without the structure wobbling.
Personalization: Adding the "Story" to Your Build
What distinguishes a generic project from a centerpiece is personalization. For the Wrights, this meant using Ed’s old license plate collection. Each plate represented a place they had lived or friends they had visited, turning the front of the bar into a visual travelogue.
Functional Upgrades
Once the main structure is complete, you can add "upgrades" as inspiration strikes. Consider these additions to increase the utility of your bar:
- LED Lighting: Ed and Jan added LED strips underneath the bar top to provide a soft glow for evening gatherings.
- Bottle Openers: A wall-mounted bottle opener with a magnetic cap catcher is a classic and inexpensive addition.
- Storage: The back of the pallets naturally creates "shelves" that can be used to store glassware, mixers, or outdoor speakers.
Conclusion: The "Not Insurmountable" DIY Attitude
The story of the pallet bar is more than just a construction tutorial; it’s a testament to the DIY spirit passed down through generations. From Ed helping his father overcome the limitations of arthritis to Ed and Jan collaborating on their own home, the project reflects the idea that roadblocks are simply puzzles waiting to be solved.
Building a pallet bar is a manageable weekend project that offers immense satisfaction. It repurposes waste, saves money, and creates a dedicated space for making memories with friends and family. By focusing on structural integrity—like the Wrights’ iron pipe leveling system—and finishing the wood to a high standard, you can create an outdoor feature that looks professional and lasts for years.
As you look at your own yard this season, remember Ed’s advice: any challenge you hit is "not insurmountable." With a few pallets and a vision, your backyard can become the neighborhood's favorite destination.