
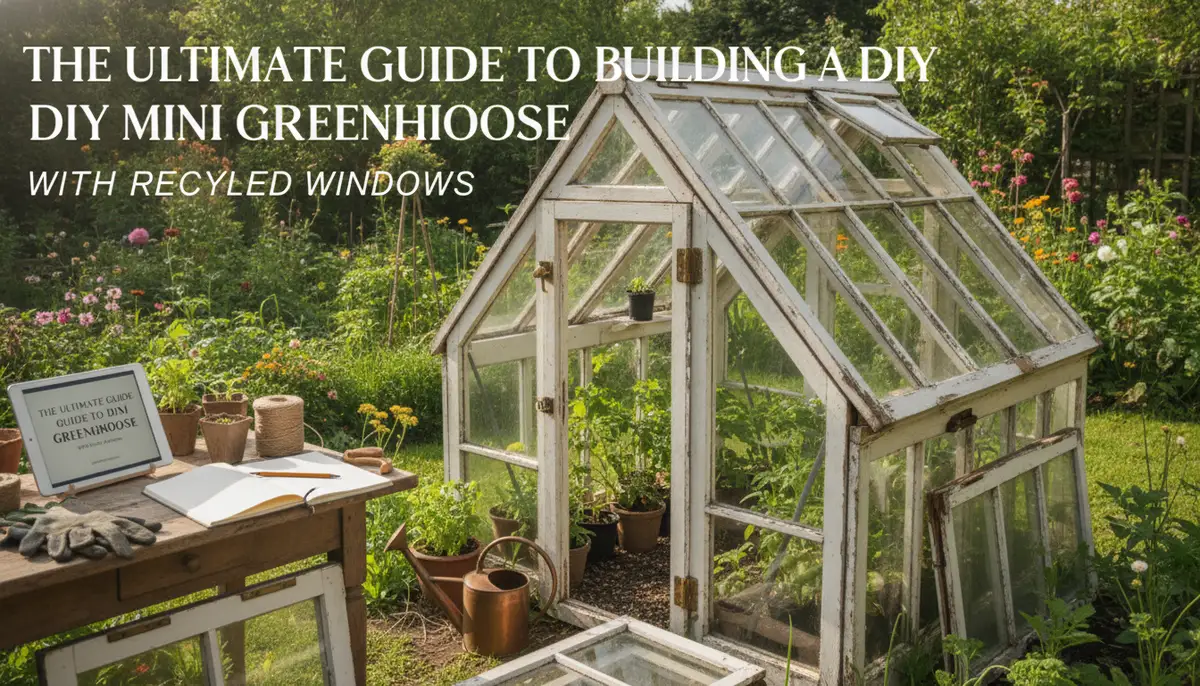
The Ultimate Guide to Building a DIY Mini Greenhouse with Recycled Windows
Extending the Harvest: The Value of a Mini Greenhouse
For many gardeners, the arrival of the first frost is a somber occasion, marking the end of the vibrant growing season. However, a mini greenhouse offers a strategic solution to the limitations of local climates. Whether you are dealing with the short summers of the Midwest or unpredictable spring hail in the plains, a dedicated garden shelter provides a controlled environment that can add weeks, or even months, to your productive window.
Beyond temperature control, a mini greenhouse acts as a physical fortress. It keeps at bay the local wildlife—such as rabbits and squirrels—that often view a well-tended garden as a personal buffet. By building your own structure, specifically one utilizing upcycled materials like old windows, you combine sustainability with high-end garden aesthetics. This project, while requiring an intermediate skill level and a budget of $1500 to $2000, results in a permanent garden fixture that enhances both your harvest and your property's charm.
Safety First: Sourcing and Testing Recycled Windows
The soul of this project lies in the character of recycled windows. Often found at architectural salvage yards or through local classifieds, these windows provide a vintage look that modern kits cannot replicate. However, working with salvaged materials from older homes requires a rigorous commitment to safety.
The Lead Paint Protocol
Before you drive a single nail or strip a layer of paint, you must test for lead. Most windows manufactured before 1978 have a high probability of containing lead-based paint.
- Testing: Purchase a lead test kit from a hardware store. Follow the instructions to sample the existing finish.
- Ventilation: If the windows test positive, work exclusively outdoors in a well-ventilated area.
- Dust Control: The golden rule of lead safety is to never sand or scrape in a way that creates airborne dust. Use a plastic liner to catch any falling debris and utilize a shop vac equipped with a HEPA filter.
- Disposal: Seal vacuum bags and debris liners carefully before disposal to prevent environmental contamination.
Restoring Vintage Windows for Outdoor Longevity
Once you have cleared the safety hurdles, the restoration process begins. Because these windows will be exposed to high humidity and direct sunlight, the preparation phase is the most critical part of the build.
Stripping and Repairing
Start by removing all existing hardware, including old pulleys, rope, and hinges. Use pliers for stubborn staples, but exercise caution with brass hardware, which is soft and easily stripped. Use a putty knife to gently remove loose, flaking paint. If you encounter cracks or split end grain in the wood frames, fill them with a high-quality wood filler or Bondo. This material is excellent for outdoor use as it resists shrinking and provides a stable surface for painting.
The Art of Reglazing
If the original window glaze is cracked or missing, the glass will not be properly sealed against moisture.
- Clean the tracks: Remove all loose old compound.
- Knead the compound: Work the glazing compound in your hands until it is warm and pliable.
- Apply: Roll the compound into 1/2-inch thick ropes and press them into the edge of the glass at an angle.
- Smooth: Use a putty knife to create a clean, angled seal that allows water to run off rather than pool against the wood.
Priming and Painting for the Elements
To ensure your greenhouse survives the seasons, you cannot rely on standard interior paint. The wood frames will expand and contract as temperatures shift, and the finish must be flexible enough to move with it.
Apply two to three coats of a triple-thick primer. This specific type of primer is designed to bridge small gaps and seal weathered wood. For the best aesthetic results, consider tinting your primer toward your final topcoat color. Once the primer has cured, apply two to three coats of exterior-grade paint. This creates a durable barrier against UV rays and moisture. For the non-painted cedar components of the base, apply a high-quality spar varnish to maintain the wood's natural beauty while providing weather protection.
Constructing the Garden Bed Foundation
The base of your mini greenhouse serves as the structural anchor. This garden bed is built by creating four separate side panels: two long sides and two short sides.
Panel Assembly
Each panel is constructed by stacking three side pieces (referred to as A or B in the plans) and securing them with vertical battens.
- Outer Battens (C): These are placed at the ends of the stacked boards.
- Central Batten (D): This provides mid-span support to prevent the boards from bowing over time.
When assembling, use wood glue and brad nails to pin the battens in place initially. Once you have well-regarded that the panel is perfectly square, reinforce the structure with deck screws. This "belt and suspenders" approach ensures the base can handle the weight of the soil and the pressure of the window frames above.
For those looking to optimize the interior of this space, understanding the layout is key. You may want to Maximize Your Harvest: The Essential Guide to Designing a Productive Raised Bed Garden Layout to ensure your greenhouse interior is as efficient as its exterior is beautiful.
Integrating the Greenhouse into Your Landscape
A mini greenhouse is more than just a functional tool; it is a design element. When choosing a location, prioritize southern exposure to maximize sunlight during the shorter days of spring and fall. Because this structure is built with recycled windows, you can adjust the ventilation manually. On hot days, propping the windows open prevents "cooking" your plants, while closing them during a late-season cold snap provides the necessary insulation.
If you are placing your greenhouse in an area prone to early-season growth, you should also consider The Ultimate Early Spring Weed Prevention Guide: How to Stop Weeds Before They Start. Ensuring the ground beneath and around your greenhouse is clear of invasive species will save you significant maintenance time later in the year.
Final Assembly and Finishing Touches
With the garden bed panels constructed and the windows restored, the final assembly involves joining the panels and mounting the windows. Because the dimensions of your greenhouse are dictated by the specific windows you found, ensure that your uprights (L) are notched correctly to receive the panels.
Before the final installation of the glass, do a final "touch-up" pass. Fill any remaining fastener holes with exterior-grade wood filler and apply a final coat of paint or varnish. This extra step prevents moisture from seeping into the screw holes, which is often where rot begins in outdoor furniture.
Building a mini greenhouse is a labor of love that pays dividends in fresh produce and garden longevity. By upcycling old windows, you aren't just building a garden bed; you are preserving a piece of architectural history and giving your plants the ultimate shelter they deserve.