
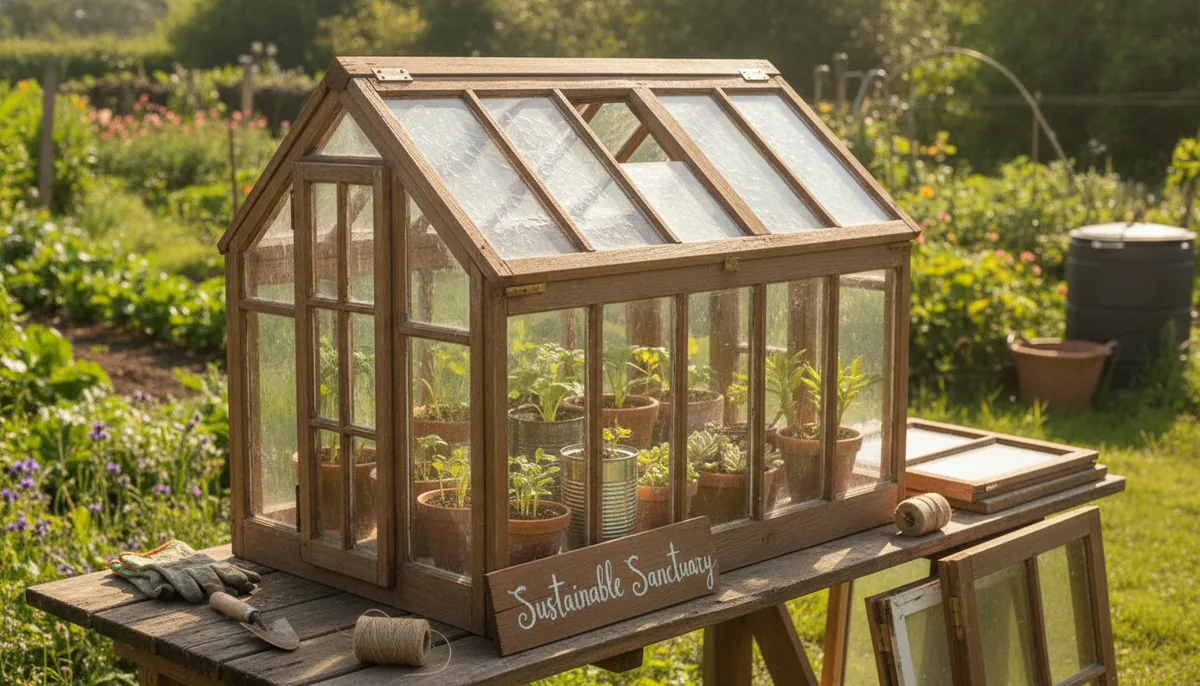
DIY Mini Greenhouse Guide: Build a Sustainable Sanctuary with Recycled Windows
For many gardeners, the arrival of autumn is a bittersweet moment. It signals the end of the harvest and the beginning of a long wait for the first thaw. However, a mini greenhouse offers a way to defy the calendar. By capturing solar heat and providing a physical barrier against the elements, these structures allow you to start your seeds weeks earlier in the spring and keep your hardy greens growing well into the first frosts.
Building a greenhouse doesn't have to mean buying a generic plastic kit. By using recycled windows, you can create a structure that is as aesthetically pleasing as it is functional. This project combines the principles of sustainable upcycling with intermediate-level woodworking to give your garden a custom, high-end shelter.
Why Choose a Mini Greenhouse?
The primary advantage of a mini greenhouse is microclimate control. While a full-sized greenhouse requires significant yard space and often a permit, a mini greenhouse can sit directly atop a raised bed or a small patch of soil. This setup is particularly effective for protecting vulnerable seedlings from the erratic weather of early spring—think sudden hail, late-season frost, or heavy wind gusts.
Beyond climate control, these structures serve as a formidable defense against local wildlife. If you’ve struggled with rabbits, squirrels, or deer treating your garden as an all-you-can-eat buffet, the solid glass and wood construction of a window-based greenhouse provides a level of security that bird netting simply cannot match. To get the most out of your growing space, consider how this structure integrates with your overall Maximize Your Harvest: The Essential Guide to Designing a Productive Raised Bed Garden Layout.
Sourcing and Preparing Recycled Windows
The soul of this project lies in the windows. Salvage yards, habitat restoration stores, and online marketplaces are excellent sources for old wooden windows. When selecting windows, look for frames that are structurally sound, even if the paint is peeling or the glazing is cracked.
The Critical Safety Check: Lead Paint
Before you pick up a scraper or a sander, you must address the potential for lead paint. Most wooden windows manufactured before 1978 contain lead-based pigments.
If your windows test positive, do not despair—you can still use them. The key is to avoid creating dust. Never sand lead paint. Instead, work outdoors in a well-ventilated area and use a "wet scraping" method or simply stabilize the existing paint with a high-quality primer. Always use a HEPA-filtered vacuum for cleanup and wear a respiratory mask designed for lead particles.
Restoring the Windows for Longevity
Old windows have character, but they also have decades of wear. To ensure your greenhouse lasts for years, you need to perform some basic restoration.
- Hardware Removal: Use pliers and screwdrivers to remove old pulleys, hinges, and handles. Be gentle with brass hardware, as it can be brittle.
- Stabilizing the Wood: Use a putty knife to remove only the loose, flaking paint. For deep cracks or split end grain, use a high-performance filler.
Mix small batches of the filler and work it flush to the surface. Once dry, sand the filler smooth. If you are working over lead paint, ensure you are using a HEPA vacuum to catch every particle of dust.
- Reglazing: If the old putty (glaze) is falling out, the glass will be loose and prone to breaking. Clean out the old glaze, knead fresh glazing compound until it’s pliable, and press it into the seam at a 45-degree angle. Smooth it with a putty knife for a professional, watertight seal.
Building the Greenhouse Base and Frame
The base of the greenhouse functions much like a high-quality raised bed. For this build, we use a combination of pine for the upper components and cedar for the elements that will face the most moisture.
Constructing the Side Panels
The garden bed portion of the greenhouse is built by creating four separate panels (two long sides and two short sides). Each panel consists of horizontal side pieces stacked and secured with vertical battens.
- Battens: Use wood glue and brad nails to pin the battens to the back of the side pieces.
- Reinforcement: Once everything is square, reinforce the joints with deck screws.
Using a sturdy base not only supports the weight of the glass windows but also helps in The Ultimate Early Spring Weed Prevention Guide: How to Stop Weeds Before They Start by providing a controlled environment where weeds can be managed before they take hold.
Priming and Painting for the Elements
A greenhouse is a high-moisture environment. Between the external rain and the internal humidity from the plants, the wood is under constant stress. Proper finishing is the difference between a structure that lasts three years and one that lasts twenty.
The Power of Triple-Thick Primer
Standard primers may not be enough for weathered, recycled wood. A "triple-thick" primer is designed to fill small cracks and lock down peeling edges, creating a smooth surface for your topcoat.
Apply two to three coats of primer to all sides of the window frames and the wooden base. For a professional look, tint your primer toward your final paint color. Once the primer is cured, apply two coats of high-quality exterior-grade paint. This creates a "shell" that allows the wood to expand and contract without the paint film breaking.
Assembly and Final Touches
With your windows restored and your base panels built, it’s time for assembly. This is where the project truly comes together.
- Join the Panels: Screw the side panels together to form the rectangular base. Ensure the structure is level; an unlevel base will make it difficult to open and close the windows.
- Install the Uprights: The uprights will hold the window frames in place. Depending on your design, you may want the windows to be fixed or hinged. Hinged windows are superior for temperature control, as they allow you to vent the greenhouse on hot afternoons.
- Seal the Joints: Use a high-quality exterior caulk to seal any gaps where the wooden components meet. This prevents water from pooling in the joints and causing rot.
This approach to gardening—valuing the history of materials while creating something new—echoes the philosophy found in Preservation with Purpose: Design Lessons from Pamela Anderson’s Garden of Eden. It’s about building a space that feels integrated into the landscape rather than just placed upon it.
Maintaining Your Mini Greenhouse
To keep your greenhouse in top shape, perform an annual inspection. Check the glazing for any new cracks and touch up any paint that has chipped. If you live in an area with heavy snowfall, ensure you clear the roof windows regularly, as the weight of wet snow can shatter old glass.
By investing the time into a DIY mini greenhouse, you aren't just building a garden accessory; you are creating a specialized tool that will reward you with fresher vegetables, healthier starts, and a more beautiful backyard for years to come.